
These Easy Classic Lemon Bars are a perfect combination of tart and sweet! I love that the thickness of the shortbread crust. I have had lemon bars that had a thick crust and I felt like I was eating a cookie smothered in lemon curd, I much prefer this crust as it is a bit thinner and I can appreciate the combination of flavors together a bit more.
Alright, you ready?! Let’s get baking!!
Supplies
- Measuring cups, spoons, and measuring scale
- Whisk
- Lemon zester or fine grater
- 2 Large bowls
- Small bowl
- Rubber spatula
- Pastry cutter or fork
- 8″ x 8″ pan
- Non-stick cooking spray
Instructions on How to Make Easy Classic Lemon Bars
Preparing the Crust
Preheat the oven to 350 degrees and prepare your baking dish by spraying down the pan. Add parchment paper. so that it fits inside the baking dish, but extends over the pan a few inches on two opposite sides (the sides that are the farthest distance from each other – so if you are doing a 9×13 pan (if you doubled this recipe), for example, you would have parchment that is about 9×19. Doing this will allow you to lift the lemon bars straight out of the pan after its completely cooled so that it is easier to cut.
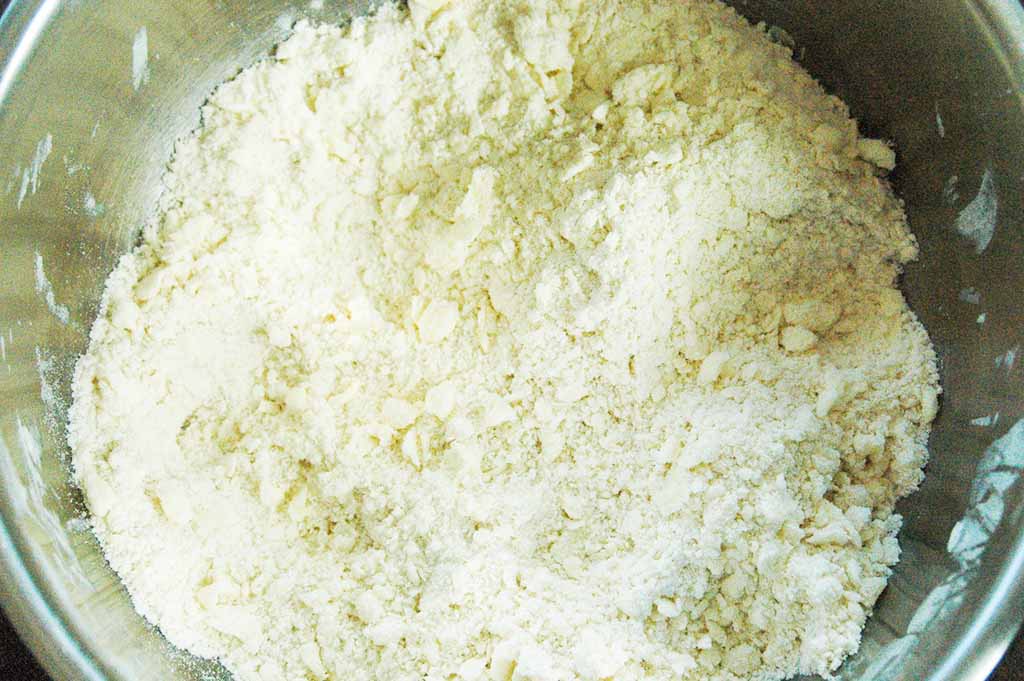
In a large bowl, whisk together flour, sugar, salt, and cut in the butter using a pastry cutter or fork. You will continue to work on cutting the butter until the mixture resembles coarse crumbs. If you touch the crust mixture, it will feel soft and be easily moldable in your hands.
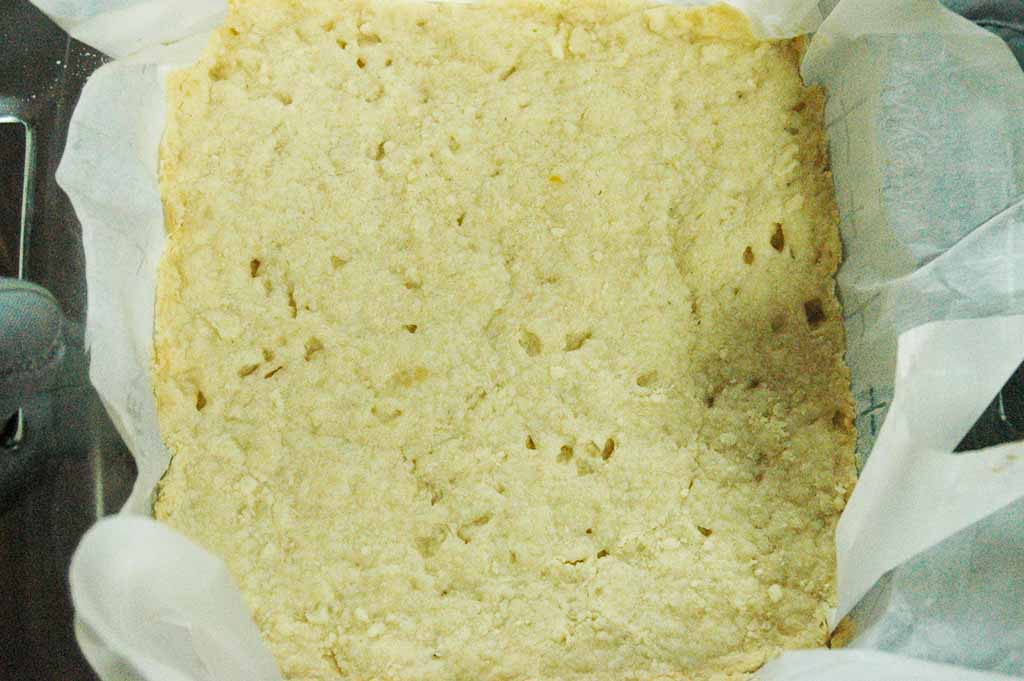
Spread the mixture in an even layer in the bottom of your prepared baking dish. Then, using your hands or the back of a spoon press down to compress the crust into an even layer.
Bake for 20 minutes. It should have a slightly golden brown color to it.
Preparing the Filling
Whisk together the granulated sugar, all-purpose flour, eggs, zest and lemon juice together, making sure that the everything is thoroughly incorporated and that the egg is completely broken down.
To zest and juice the lemons you will want to first zest the lemon. You will use a lemon zester or a fine grater and rub it against the lemon to remove the outermost part of the skin. You don’t want to get too much of the white part because that part of the rind is bitter tasting. Then, cut down the lemon into quarters and use your fingers to squeeze the pulp to release the lemon juice into a small bowl. Be sure to scoop out any seeds before adding the juice to the mixture.
Pour the filling over the crust and bake for 25 minutes, or until the custard is set. You will know it is set because it won’t jiggle when you move the pan.
You may notice bubbles, maybe even a layer of white foamy bubbles, on the top of the surface. This is from air being released from the eggs. It is completely normal for lemon bars to have bubbles, and will be covered up by powdered sugar just before serving.
Allow the easy classic lemon bars to cool completely at room temperature. After it is completely cooled, you can carefully lift out the bars by pulling up on the parchment paper and sliding the pan out. It firms up as it cools so if you don’t wait for it to be completely cool you will have a disastrous mess, so be patient!
Cut the bars into squares and dust with confectioner’s sugar. You can do this with a fine meshed strainer, by tapping the sides of the strainer (or carefully shaking the strainer) to allow the confectioners sugar to fall lightly onto the bars.
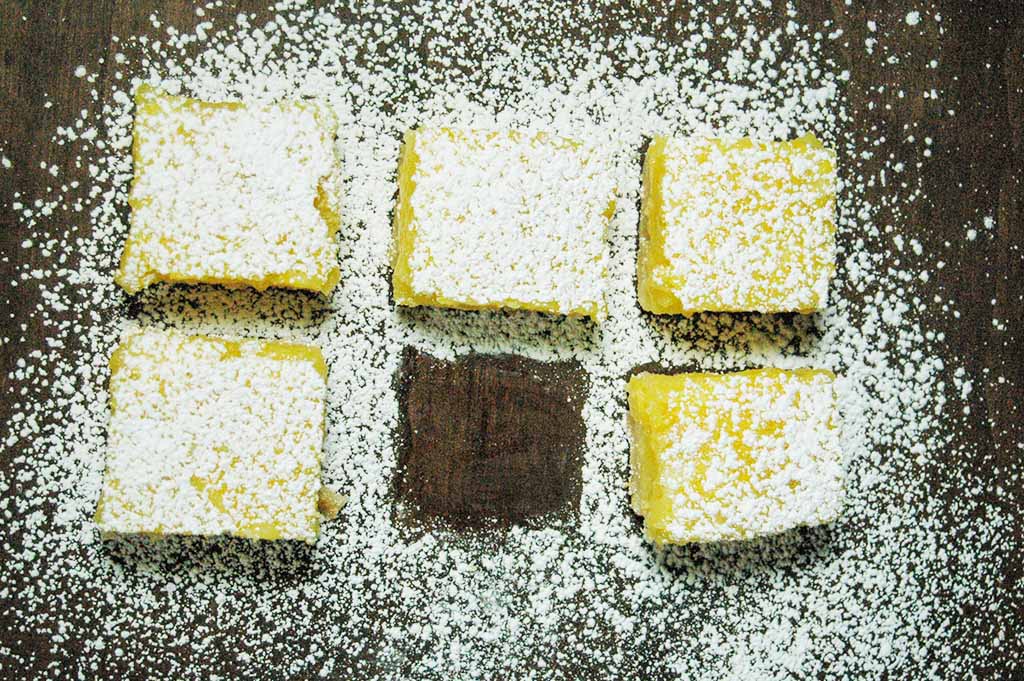
If you won’t be serving these bars right away you will want to wait until just before serving to dust with the confectioner’s sugar. Otherwise, the powdered sugar will soak into the bars and you will want to dust it again.
These easy classic lemon bars can be stored in an airtight container in the fridge for a day or two. If you need it to last longer, you will want to store it in the freezer until you are ready to serve it.
Looking for More Lemon Recipes?
- Lemon Crinkle Cookies
- Strawberry Lemon Blondies with Strawberry Glaze
- Classic Lemon Meringue Pie
- Lemon Rhubarb Bars
- Raspberry Jelly Filled Cupcake with Lemon Buttercream Frosting
- White Chocolate Lemon Cranberry Scones
Easy Classic Lemon Bars

These Easy Classic Lemon Bars are everything you would expect to from a Lemon Bar. The smooth lemon curd is a perfect combination of tart and sweet, the thickness of the crust lends the perfect ratio of crust-to-filling so that you can thoroughly appreciate all the flavors together!
- Prep Time: 20 minutes
- Cook Time: 40 minutes
- Total Time: 1 hour
- Yield: 16 bars
- Category: Bars
- Method: Bake
- Cuisine: American
Ingredients
Crust
- 1–1/4 cups (150 grams) all-purpose flour
- 1/2 cup (50 grams) confectioner’s sugar
- 1/2 teaspoon kosher salt
- 1/2 cup unsalted butter, cold
Filling
- 1–1/2 cups granulated sugar
- 1/4 cup all-purpose flour
- 4 large eggs
- 1 tablespoon of lemon zest (zest from 1 lemon)
- 2/3 cup lemon juice (juice from 3 lemons)
- Confectioner’s sugar, for dusting before serving
Instructions
Preparing the Crust
- Preheat the oven to 350 degrees and prepare your 8×8 baking dish by spraying down the pan. Add parchment paper so that it fits inside the baking dish, but extends over the pan a few inches on two opposite sides. Go ahead and give it another spray.
- In a large bowl, whisk together flour, sugar, salt, and cut in the butter using a pastry cutter or fork, until the mixture resembles coarse crumbs. If you touch the crust mixture, it will feel soft and be easily moldable in your hands.
- Spread the mixture in an even layer in the bottom of your prepared baking dish. Then, using your hands or the back of a spoon press down to compress the crust into an even layer.
- Bake for 20 minutes. It should have a slightly golden brown color to it.
Preparing the Filling
- Whisk together the granulated sugar, all-purpose flour, eggs, zest and lemon juice together, making sure that the everything is thoroughly incorporated and that the egg is completely broken down.
- Pour the filling over the crust and bake for 25 minutes, or until the custard is set.
- Allow the classic lemon bars to cool completely at room temperature. After it is completely cooled, you can carefully lift out the bars.
- Cut the bars into squares and dust with confectioner’s sugar, just before serving.
Notes
- Bubbles rising to the top of the pan is completely normal and will be covered with confectioners sugar just before serving.
- These classic lemon bars can be stored in an airtight container in the fridge for a day or two. If you need it to last longer, you will want to store it in the freezer until you are ready to serve it.
Want to remember this Easy Classic Lemon Bars Recipe? Save this pin to your favorite Pinterest board!


Leave a Reply