
This butter flavored Flaky Pie Crust From Scratch is easy to make! It is more intimidating to think about making this crust than it is to actually make it!
The trick is to use cold butter and shortening.
This will allow the fats to hold together and not break down too much.
Softened butter allows you to overwork it.
You want to have small clumps of butter in the dough as it will give it the perfect flaky texture.
Alright, you ready?! Let’s get baking!!

Supplies
- Measuring cups, spoons, and measuring scale
- Large bowl
- Spatula
- Pastry blender or fork
- Plastic wrap


Instructions on How to Make Flaky Pie Crust From Scratch
This recipe makes two crusts. You may need both crusts if you are doing a top crust over your pie. Otherwise, you can divide the recipe in half or you can freeze the second crust for another time.
In a large bowl, whisk together the all-purpose flour and salt.
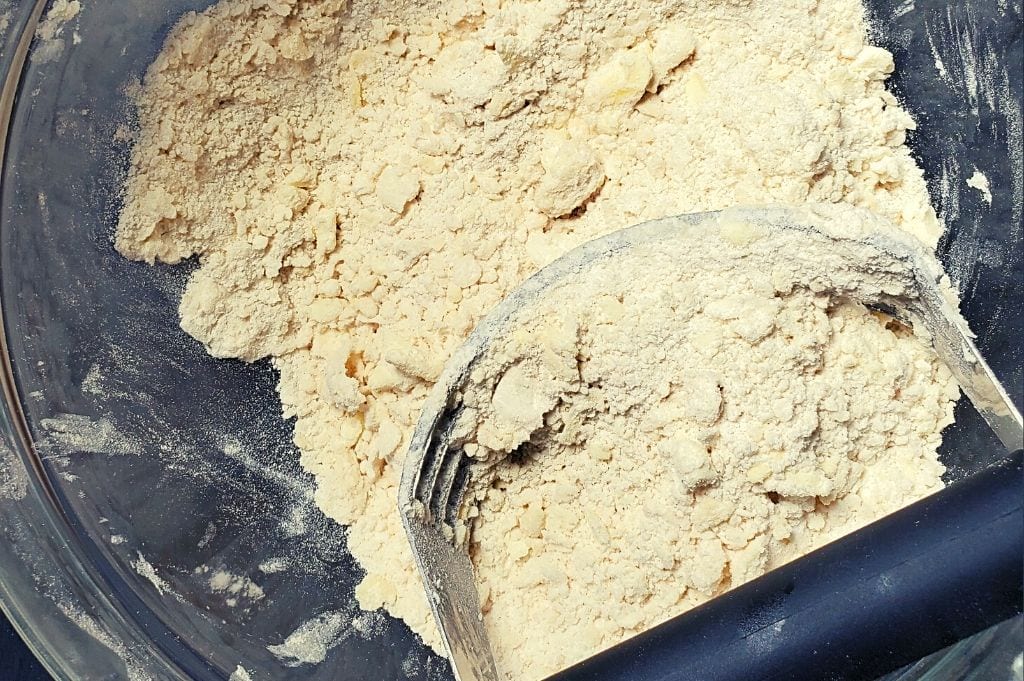
Add the chilled butter and vegetable shortening and use a pastry cutter to cut them into the flour.
Continue to cut into the butter and shortening until the pieces are crumbly, yet there are still some pea-sized pieces remaining.
Be sure not to break down the fats too much or you won’t have the flaky crust.
Add ice to the water to chill the water and stir. Remove the ice.
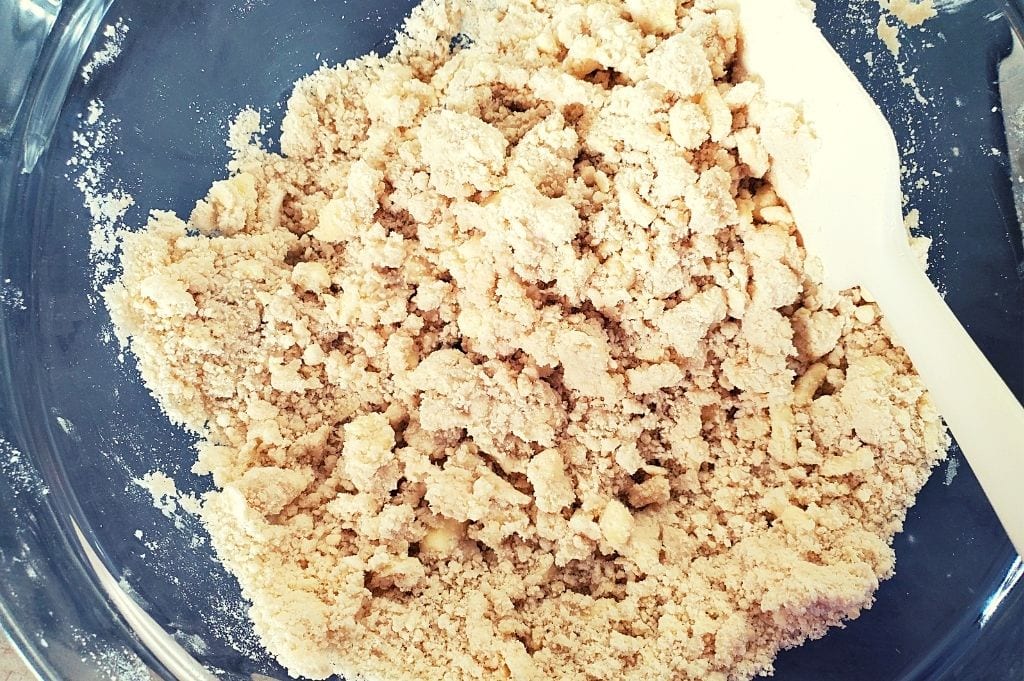
You will add 1 tablespoon of water at a time, and mix the dough between each addition.
The dough will start to form large clumps, you will also be able to form the dough into a ball without it falling apart.
Be aware of how much water you are putting in, because you don’t want to add too much that your dough becomes wet, but you don’t want to be too stingy where the dough will be too dry and cracks.
I added 1/4 cup of water for this batch, but you could easily add up to 1/2-3/4 cup depending on how dry or humid your home is.
Lightly flour your work surface and transfer your dough to fold the dough into itself several times.
It shouldn’t be too sticky, and the dough should not be crumbly at all.
Make sure that the flour is evenly dispersed within the fats. Fold the dough more if you need to.
Again, be sure not to overwork your fats. You will want to see some of the butter chunks in your dough!
Form the dough into a ball, and split in half. Use your hands to form a round, 1-inch thick disk.
Wrap tightly in saran wrap (plastic wrap) and place in the refrigerator for two hours.
When rolling out your dough, place the rolling pin in the center of the round and gently press outward with even pressure.
Pick up the dough and rotate it 1/8 of a turn and do another press with the rolling pin going outwards.
This will allow the dough to spread out into an even circle.

You will see flakes of butter in the crust, and you want this to give the flakiness texture in your crust.
Follow the instructions for your pie recipe.
If you need to blind-bake your crust, you can find instructions on how to blind-bake your pie crust.
Blind baking is when you prebake your crust some or all of the way before assembling the pie ingredients into the pie crust..

You’ll love these recipes too!
- Old Fashioned Strawberry Pie
- Classic Lemon Meringue Pie
- Easy Homemade Pumpkin Pie
- Snickerdoodle Cream Cheese Apple Pie
- Quick and Easy Strawberry Galette
- Chocolate Chip Cheesecake with Graham Cracker Crust
- Pecan Pie
- Easy Mixed Berry Pavlova
- Cherry Pie Bars
- Quick & Easy Apple Crisp
- Pinneapple Upside Down Cake
- Strawberry Rhubarb Crisp
Please leave a review!
If you bake this recipe I would greatly appreciate if you leave a star review in the comment section at the bottom of the page 👇! Leaving a comment helps me know what recipes you are loving so I can create more for you!
PrintFlaky Pie Crust From Scratch

This butter flavored Flaky Pie Crust From Scratch is easy to make! It is more intimidating to think about making this crust than it is to actually make it!
The trick is to use cold butter and shortening. This will allow the fats to hold together and not break down too much. Softened butter allows you to overwork it. You want to have small clumps of butter in the dough as it will give it the perfect flaky texture.
- Prep Time: 15 minutes. 2 hour chill time
- Cook Time: 0 minutes
- Total Time: 2 hours, 15 minutes
- Yield: 2 crusts
- Category: Pie
- Method: bake
- Cuisine: American
Ingredients
- 2–1/2 cups (315 grams) all-purpose flour, spooned and leveled
- 1-1/4 teaspoons salt
- 6 Tablespoons (90grams) unsalted butter, chilled and cubed
- 3/4 cup (148 grams) vegetable shortening, chilled
- 1/2 cup (120 ml) ice water, only use amount as needed
Instructions
This recipe makes two crusts. You may need both crusts if you are doing a top crust over your pie. Otherwise, you can divide the recipe in half or you can freeze the second crust for another time.
- In a large bowl, whisk together the all-purpose flour and salt. Add the chilled butter and vegetable shortening and use a pastry cutter to cut them into the flour. Continue to cut into the butter and shortening until the pieces are crumbly, yet there are still some pea-sized pieces remaining. Be sure not to break down the fats too much or you won’t have the flaky crust.
- Add ice to water to chill the water and stir. Remove the ice. You will add 1 tablespoon of water at a time, and mix the dough between each addition. The dough will start to form large clumps, you will also be able to form the dough into a ball without it falling apart. Be aware of how much water you are putting in, because you don’t want to add too much that your dough becomes wet, but you don’t want to be too stingy where the dough will be to dry and cracks.
- I added 1/4 cup of water for this batch, but you could easily add up to 1/2-3/4 cup depending on how dry or humid your home is.
- Lightly flour your work surface and transfer your dough to fold the dough into itself several times. It shouldn’t be too sticky, and the dough should not be crumbly at all. Make sure that the flour is evenly dispersed within the fats. Fold the dough more if you need to. Again, be sure not to overwork your fats. You will want to see some of the butter chunks in your dough!
- Form the dough into a ball, and split in half. Use your hands to form a round, 1-inch thick disk. Wrap tightly in saran wrap (plastic wrap) and place in the refrigerator for two hours.
- When rolling out your dough, place the rolling pin in the center of the round and gently press outward with even pressure. Pick up the dough and rotate it 1/8 of a turn and do another press with the rolling pin going outwards. This will allow the dough to spread out into an even circle.
- You will see flakes of butter in the crust, and you want this to give the flakiness texture in your crust.
- Follow the instructions for your pie recipe. If you need to blind-bake your crust. You can find instructions on how to blind-bake your pie crust.
Notes
You can store the round disks in the fridge for up to five days, or freeze it for up to three months. Thaw overnight in the refrigerator before rolling out.
Want to remember this Flaky Pie Crust From Scratch? Save this pin to your favorite Pinterest board!


Leave a Reply